Step-Free Route: Home → Nearest Clinic (Timed, Photographed) — The Complete Guide to Accessible Care Routes
If getting to care is a hurdle, care isn’t truly accessible. This guide shows you exactly how to map, time, and photograph a step-free route from home to your nearest clinic, so you—or a family member—can get there confidently, any day of the year. You’ll learn what “step-free” really means, how to verify it, how to document it with geotagged photos, and how to keep an up-to-date, shareable route that stands up under real-world conditions.
Table of Contents
Why a step-free route: home → nearest clinic (timed, photographed) matters
Distance and travel time to care shape whether people make it to appointments and, in some settings, even influence outcomes. Systematic reviews and cohort studies consistently link longer travel times with lower utilization and, for some conditions like cancer, worse outcomes—evidence that the minutes between your door and the clinic matter more than most people think.
Globally, an estimated 1.3 billion people (1 in 6) live with significant disabilities—so step-free, clearly documented routes aren’t a niche improvement; they’re public health infrastructure.
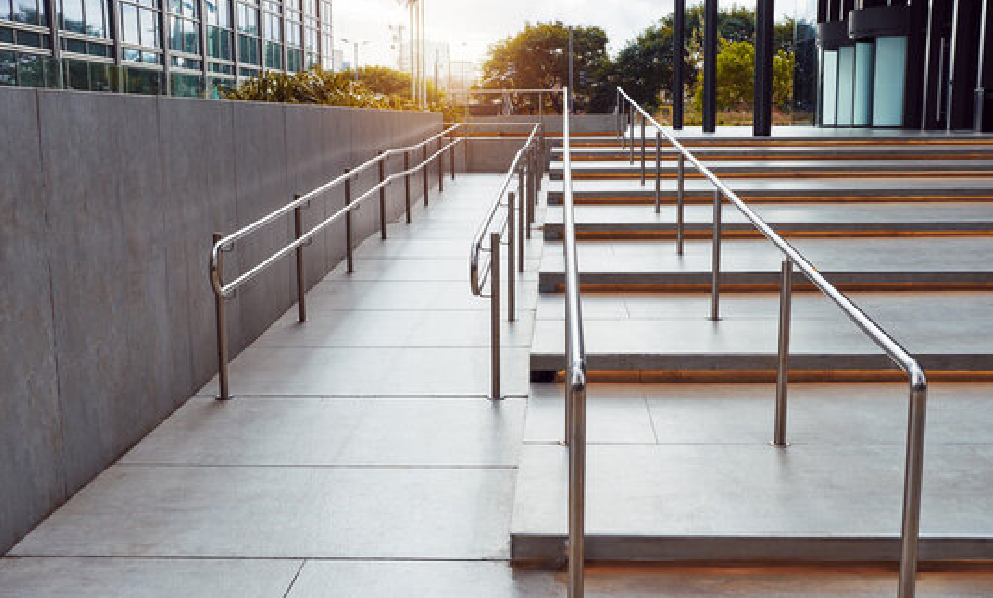
What counts as step-free (and what commonly fails a real-world test)
“Step-free” isn’t just “no stairs.” On an accessible route, surfaces and slopes must stay within specific limits so users of wheelchairs, walkers, strollers, or canes can move safely and independently.
- Walking surfaces: running slope ≤ 1:20 (5%); cross-slope ≤ 1:48 (≈2.08%).
- Ramps: when slope > 1:20, it must meet ramp rules—max slope 1:12, min clear width 36 in (915 mm), max rise 30 in (760 mm) per run, and level landings at top/bottom and at direction changes.
- Curb ramps & tactile warnings: curb ramps bridge levels where curbs remove the step; detectable warning surfaces (truncated domes) cue street edges for people with low vision.
Those dry numbers spare you nasty surprises: a 1:10 “shortcut” or a tilted driveway (cross-slope) that tips a chair sideways can be more dangerous than a short detour that stays within spec. If your town uses different codes, these benchmarks still function as a safety floor.
The outcome-first mindset: speed, capacity, and energy
When you time a route, you’re not going for a personal best—you’re checking that the path consistently fits your energy, device, and environment.
- Healthy adults typically walk outdoors around 1.31 m/s (4.7 km/h) at a usual pace, but many walk slower, especially on uneven surfaces.
Observed daily mobility speeds for manual wheelchair users often range ~0.43–0.80 m/s in real-world settings—much slower on slopes or rough surfaces.
Translate those into planning buffers. If your clinic is 600 m away, a “flat, smooth” 10-minute walk for one person may be 20 minutes—and several rest stops—for another. Build your time plan around your pace and conditions, not an app’s guess.
Before you start: define your step-free route: home → nearest clinic (timed, photographed) goal
- Primary route: your best everyday path (totally step-free, within slope limits, well-lit, predictable).
- Backup route: a variation for elevator outages, construction, flooding, or crowding.
- Transit route (if applicable): wheelchair-accessible buses/trains with step-free stations and working lifts. Google Maps’ Wheelchair accessible filter can help for transit legs; Apple Maps transit can show departures and steps in transfers where available.
Save and name all three. You’re not done until you can switch between them without stress.
Tools that make the work lighter (and more reliable all year)
- Mapping & discovery
- Google Maps: turn on Accessible Places to reveal wheelchair entrance, restroom, parking, and elevator info where available; use the transit filter Wheelchair accessible for step-free public transport.
- Apple Maps: plan transit with arrival/departure times; save routes for routine visits.
- OpenStreetMap community tools: Wheelmap flags accessible entrances; OpenRouteService offers wheelchair-aware routing in supported regions and keeps improving coverage.
- Timing & measurement
- Use your phone’s Clock → Stopwatch and repeat at different times of day.
- Slope reality-check: a quick rule of thumb—if you rise 1 m over 12 m of run (8.3%), it’s too steep for an ADA-compliant ramp; aim ≤ 1:12 only where proper ramp standards are met, and prefer ≤ 1:20 for “walking surfaces.”
- Photography & metadata (the “photographed” in the focus phrase)
- iPhone/iPad: view and manage photo time and location metadata in Photos; control or remove location if needed when sharing.
- Android/Google Photos: turn camera location on/off and view or edit a photo’s location in Google Photos.
- Accessibility of your documentation
- When you publish route guides online, provide alt text for images (“curb ramp with tactile domes, slope ~1:12, 1.8 m wide”) to meet WCAG 2.1 expectations.
Fieldwork: build your route like a pro
You’re going to walk/roll your candidate path, time it, and photograph decision points. Think like future-you on a rainy evening with a full bag and low energy.
1) Map a candidate route.
Start with the most direct “step-free” option the map suggests, then draw a second option that avoids any questionable slopes, alley shortcuts, or construction alerts.
2) Time the route under normal conditions.
- Start the stopwatch at your front door.
- Stop it at the clinic’s accessible entrance—not the curb.
- Repeat on a weekday morning and a weekend to capture crowd and traffic differences; average the times.
3) Photograph the route as evidence—and as a guide for anyone who’ll use it.
Capture images that show:
- Front door threshold and any lip or mat that could catch wheels.
- Sidewalk cross-slope segments (if the path tilts toward the street, it can be risky even without steps).
- Curb ramps: width, surface (tactile domes), ponding after rain, and whether the ramp aligns properly with the crosswalk.
- Complex intersections: signal buttons reachable from a level area, crossing times, refuge islands.
- Narrow points: poles or planters that squeeze width below 36 in (915 mm).
- Clinic entrance: door width, automatic opener, threshold changes, elevator lobby, accessible restroom on the route to the waiting area.
4) Label photos immediately.
- Use a simple code: 01_Home-Threshold.jpg, 02_SidewalkCrossSlope.jpg.
- Add a short description in the photo’s caption or in a notes app: “Curb ramp, tactile domes intact, approx. 1:12; cross-slope low.”
5) Confirm against standards so your “step-free” claim holds up.
- Walking surfaces should remain ≤1:20 run and ≤1:48 cross-slope where they’re not formal ramps.
- Ramps must meet the 2010 ADA Standards: ≤1:12 slope, ≥36 in width, landings at top and bottom, and max 30 in rise per run. If a run climbs more than ~760 mm without a landing, it fails.
- Detectable warnings (truncated domes) at street-level edges or transit platforms help people with low vision locate crossings and hazards; confirm presence and intact surface.
6) Note transit reliability if you use it.
- For a step-free transit leg, pick stations/stops with accessible entrances and predictable elevators; Google’s Wheelchair accessible transit filter can surface station-level options in many cities. Document any elevator or ramp you rely on with a photo—if it’s out, your backup route becomes primary.
Photographing for clarity (and privacy)
Your album should let someone who’s never seen the route follow it with confidence. That means descriptive shots, consistent angles, and ethical sharing.
What to photograph
- Decision points: “Turn right after the bakery; curb ramp is 8 m ahead.”
- Risk spots: steep driveways, broken pavers, puddle-prone dips.
- Entrance logistics: buzzer height, card readers, door closers, reception desk reach.
- Rest points: benches or level areas every few hundred feet if the gradient is continuous (some jurisdictions even recommend formal resting areas on long gradients).
What not to photograph
- Avoid capturing faces, name badges, license plates, or private health info.
- If you’ll publish images, consider removing location metadata or sharing without it; both Apple and Google give you control.
Make your photos accessible
- Add alt text that conveys what a sighted person would need from the image (“elevator to clinic level on right; call button at 1.1 m height; signage high-contrast”). WCAG’s rule of thumb: the alt text should communicate the same information the visual provides.
Timing that reflects your real life
One timed run is a snapshot. A usable guide reflects variability.
- Time of day: morning school crowds? market-day sidewalk vendors?
- Weather: wet surfaces change traction and reveal ponding at curb ramps.
- Load: try at least one run carrying what you’d bring to the clinic (bag, cane, oxygen cylinder).
- Pace: compare your usual pace with a day you’re not feeling great; plan for the slower one.
If you’re creating a route for someone else, basing the time buffer on their typical walking or rolling speed is more respectful—and safer—than using generic assumptions (e.g., planners often assume 1.33 m/s walking speed; many people move slower).
Turning a path into a living resource you—and others—can use
1) Save the route in your maps app under a clear name: “Home → Clinic (Step-Free).” Save the backup too.
2) Share a mini-guide
- One page, plain language, no jargon.
- Include: start time, total time, key turn-by-turns, three or four photos, and the clinic’s accessible entrance hours if they differ from the main entrance.
3) Keep a “change log.”
- Elevator outage? Curb works crew? Note the date, reroute suggestion, and—if you can—add a photo.
4) Contribute to the commons
- Mark accessibility on Wheelmap (green/orange/red) or add tags to OpenStreetMap (e.g., wheelchair=yes, kerb=flush, tactile_paving=yes) so the next person benefits.
How to pick the best step-free route (not just the shortest)
When two paths are both step-free, prefer the one with:
- Lower cross-slope (less side tilt = less shoulder strain, fewer tip hazards). Standards cap cross-slope at 1:48 for accessible walking surfaces.
- Fewer threshold changes (no bumps that catch small front casters).
- Wider clearances (≥36 in / 915 mm) with occasional passing spaces if segments are under 60 in wide.
- Predictable signals and shorter crossing distances; agencies often time pedestrian signals using 3.3–4.0 ft/s assumptions—if you move slower, pick crossings with longer phases or refuge islands.
- Lighting and sightlines that reduce conflict at driveways and alley mouths.
Clinic entry: the last 30 meters make or break the trip
The most frustrating failures are at the finish line. Verify:
- Accessible entrance actually open the hours you’ll arrive.
- Door width (≥32 in/815 mm clear) and opener function; note if the opener is reachable from a level spot.
- Elevator availability and signage from entrance to reception.
- Accessible restroom on the same level as waiting and exam rooms.
- Wayfinding: high-contrast, simple symbols, consistent arrows; if signs are poor, your photos double as wayfinding for the next visit.
If anything is sub-standard, your backup route—another entrance, a ramp around the corner, or a different clinic—should be on deck.
Safety and self-advocacy without confrontation
- Call ahead: ask, “Is the step-free entrance open today? Any elevator or ramp outages I should know about?”
- At the clinic: politely point out barriers (e.g., mats bunching at doors, boxes blocking corridors). Brief, factual notes plus your photos can help staff log a maintenance request.
- In your community: use your documentation to ask the city to fix broken curb ramps or ponding. Photos that show a clear slope or surface issue—not just inconvenience—are more actionable.
For caregivers and neighbors: make a one-page “route card”
If you help someone reach care, create a route card you can hand to any substitute caregiver:
- “Start at the west gate (no step at threshold).
- Turn left at the school fence; avoid the driveway with the steep cross-slope.
- Cross at Oak & 3rd (longer crossing time).
- Enter clinic via side door with automatic opener; elevator is 12 m past reception.”
Attach three photos, each with a one-line caption. That’s enough for a confident first trip
Making your route public? Design it for accessibility too
If you publish your route (neighborhood group, clinic website, social, or a personal blog):
- Keep images small in file size but large in meaning (a few decisive photos beat a hundred random frames).
- Use plain-language steps and alt text for every key image.
- Consider map platform accessibility (keyboard navigation, screen-reader labels).
- If embedding links, make them descriptive: “Download photo set (no location metadata)” rather than “click here.”
- Respect privacy; remove geotags before posting if you don’t want your home address exposed. Apple and Google both let you remove or control location data at share time.
Troubleshooting: common pitfalls and fixes
“The route’s step-free but still exhausting.”
Hidden culprits are cross-slope, rough surfaces, and crowdfunnel points. Try a slightly longer path with smoother paving and fewer driveway cuts. Standards exist because small grade and texture differences matter.
“Maps told me it’s accessible, but the door was locked.”
Mark it in your notes; make the backup route primary for those hours; send a friendly heads-up to the clinic’s front desk so they can update signage.
“The elevator was out.”
Your backup should avoid that elevator; if none exists, call the clinic for curbside services or a telehealth pivot—your time-stamped photos prove the barrier is real.
“I want to help others.”
Add your verified notes to Wheelmap, or tag the features in OpenStreetMap so wheelchair-aware routing improves for everyone over time.
Frequently asked questions—fast answers
How often should I re-time the route?
Quarterly is a good rhythm or whenever something changes (new construction, seasons).
What if there’s one unavoidable small step?
One step breaks “step-free.” Look for a ramped side entrance or a different clinic. If none exist, document the barrier clearly and ask the facility for an interim solution.
Can I share my route with the clinic?
Yes—many clinics will gladly link to a well-made, step-free access guide with photos.
Is there a “right” walking speed to plan for?
No. Plan around your speed; planners’ defaults (e.g., ~1.33 m/s) are averages, not promises.
How this article is reviewed, and how we handle accuracy
About the Authors — TisreoCare.com Content Team
- This feature was researched and written by the TisreoCare.com Content Team, a multidisciplinary group of accessibility editors, rehabilitation clinicians, urban-mobility researchers, digital-accessibility specialists, and fact-checkers. Our mission is to turn the complex mechanics of step-free route: home → nearest clinic (timed, photographed) planning into clear, practical guidance that anyone can follow.
- We synthesize primary standards and research—from accessibility codes and technical guides to peer-reviewed studies on mobility and travel time—and translate concepts like running slope, cross-slope, curb-ramp geometry, turning radius, tactile warnings, accessible wayfinding, and photo-metadata privacy into actionable steps you can use on the sidewalk and at the clinic door. Our editors prioritize government and standards-setting sources and verify every key claim against original documents before publication.
Editorial process
- Each feature follows a structured workflow: topic scoping → primary-source research → plain-language drafting → independent fact-check → accessibility review (including alt-text and inclusive language checks) → clinician review for safety and practicality → final edit.
- Health-adjacent pieces are medically reviewed by qualified experts; for this article, the clinical review was conducted by Jenny M. Lieberman, PhD, OTR/L, ATP (New York City)—an occupational therapist and Assistive Technology Professional who leads a wheelchair and seating clinic—focusing on clinical accuracy, safety, and usability for readers building step-free routes. The review supports accuracy but does not replace personal medical or rehabilitation advice.
- Independence & integrity: Our coverage is editorially independent. We do not accept compensation in exchange for favorable mention of products, clinics, or services. Any potential conflicts are disclosed, and advertising does not influence our recommendations.
- Corrections: If you spot an error, unclear statement, or accessibility issue, reach us through the site’s contact page with the line in question and a credible source. We investigate promptly and, when warranted, update the article and note the change with a timestamp.
- Reader experience: We regularly test our guidance with wheelchair users, people who use canes/walkers, low-vision travelers, caregivers, and clinic staff. Their feedback shapes our checklists, photography prompts, and timing tips so the advice works in real life—not just on paper.
References (direct links)
- World Health Organization. Disability and health – Fact sheet (2023). https://www.who.int/news-room/fact-sheets/detail/disability-and-health
- WHO. Global report on health equity for persons with disabilities (2022). https://www.who.int/teams/noncommunicable-diseases/sensory-functions-disability-and-rehabilitation/global-report-on-health-equity-for-persons-with-disabilities
- U.S. Department of Justice. 2010 ADA Standards for Accessible Design (technical sections 401–407). https://www.ada.gov/law-and-regs/design-standards/2010-stds/
- U.S. Access Board. Chapter 4: Accessible Routes – Ramps & Curb Ramps (Technical Guide). https://www.access-board.gov/ada/guides/chapter-4-ramps-and-curb-ramps/
- U.S. Access Board. Chapter 4: Accessible Routes – Walking Surfaces (403). https://www.access-board.gov/ada/chapter/ch04/
- Department for Transport (UK). Guidance on the Use of Tactile Paving Surfaces (PDF). https://assets.publishing.service.gov.uk/media/61df0c91e90e07037794fe90/guidance-on-the-use-of-tactile-paving-surfaces.pdf
- Department for Transport (UK). Inclusive Mobility: A Guide to Best Practice on Access to Pedestrian and Transport Infrastructure (PDF). https://assets.publishing.service.gov.uk/media/61d32bb7d3bf7f1f72b5ffd2/inclusive-mobility-a-guide-to-best-practice-on-access-to-pedestrian-and-transport-infrastructure.pdf
- Google. Accessibility in Google Maps – “Wheelchair accessible” transit routes & Accessible Places. https://support.google.com/maps/answer/6396990 and https://blog.google/products/maps/wheelchair-accessible-places-google-maps/
- Apple Support. Get transit directions in Maps on iPhone. https://support.apple.com/guide/iphone/get-transit-directions-ipha44f57caa/ios
- W3C WAI. WCAG 2.1 – Non-text Content (1.1.1) & related guidance. https://www.w3.org/TR/WCAG21/ and https://www.w3.org/WAI/WCAG21/Understanding/non-text-content.html
- Murtagh EM, et al. Outdoor Walking Speeds of Apparently Healthy Adults. Int J Environ Res Public Health. 2020. https://pmc.ncbi.nlm.nih.gov/articles/PMC7806575/
- Sonenblum SE, et al. Manual Wheelchair Use: Bouts of Mobility in Everyday Life. 2012. https://pmc.ncbi.nlm.nih.gov/articles/PMC3403062/
- Pinnock Branford K, et al. Inertial sensor–based analysis of manual wheelchair mobility in daily life. PLOS ONE, 2025. https://journals.plos.org/plosone/article?id=10.1371%2Fjournal.pone.0323050
- Kelly C, et al. Are differences in travel time or distance to healthcare associated with health outcomes? BMJ Open. 2016. https://bmjopen.bmj.com/content/6/11/e013059
- Hanna TP, et al. Mortality due to cancer treatment delay: systematic review and meta-analysis. BMJ, 2020. https://pubmed.ncbi.nlm.nih.gov/33148535/
- Hearn M, et al. Rural travel time and access to care. 2024. https://pmc.ncbi.nlm.nih.gov/articles/PMC11273699/
- Transport for London. Connectivity Assessment Guide (PTAL baseline walking speed 4.8 kph). (PDF) https://content.tfl.gov.uk/connectivity-assessment-guide.pdf
- National Academies (TRB). Guide to Pedestrian Analysis (NCHRP). https://nap.nationalacademies.org/read/26518/chapter/8
- Apple Support. See photo and video information on iPhone. https://support.apple.com/guide/iphone/see-photo-and-video-information-iph0edb9c18f/ios and Manage location metadata in Photos. https://support.apple.com/guide/personal-safety/manage-location-metadata-in-photos-ips0d7a5df82/web
- Google Support. Change your camera location settings and Edit photo locations in Google Photos. https://support.google.com/photos/answer/9921876 and https://support.google.com/photos/answer/6153599
- Wheelmap. Find wheelchair-accessible places (community resource). https://wheelmap.org/ and FAQ https://news.wheelmap.org/en/faq/
- HeiGIT / Heidelberg University. OpenRouteService (wheelchair routing profile). https://openrouteservice.org/ and background: https://heigit.org/a-fresh-new-ors-maps-client-2/